Install SQL
Install SQL Server Express 2008Overview
This guide describes the prerequisites and steps to install XLhub on a personal computer.
Audience
New users of XLhub who have not installed XLhub on their computer.
Prerequisites
- Excel version 2007 or 2010
- Windows XP, Windows Vista or Windows 7
- User must have Local Administrator Permission to install XLhub
[NOTE : Make sure that you have closed Excel before you begin installing XLhub.]
Flow of Events
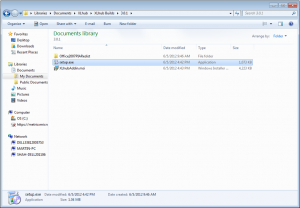
1. Download XLhub from the link at the bottom of this page and save in an easily accessible place. Extract the XLhub folder from the zip folder and double-click the file setup.exe.
2. If your computer doesn’t already have the required Microsoft runtime software, this will automatically get installed. You may see a dialog for Visual Studio Runtime for a few moments.
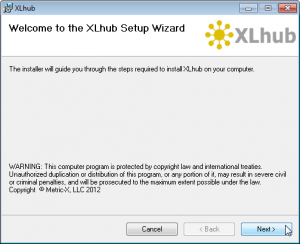
3. The XLhub Setup Wizard will appear to guide you through the installation process. Click Next.
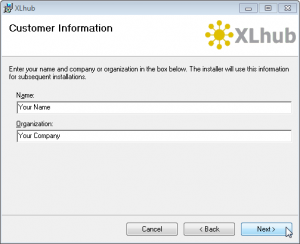
4. You will then be prompted to enter your name and company information. After doing so, click Next.
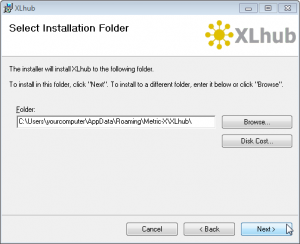
5. Next choose an installation folder where XLhub will be installed. Once the installation folder is selected, click Next.
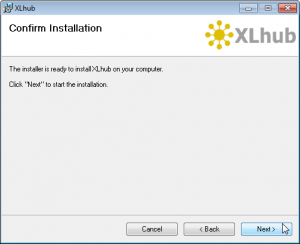
6. You will then be asked to confirm installation. Click Next.
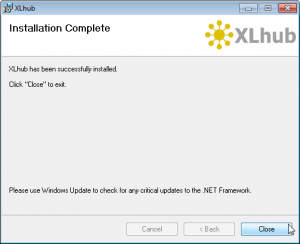
7. The install will then be completed. Click Close to exit the install wizard.
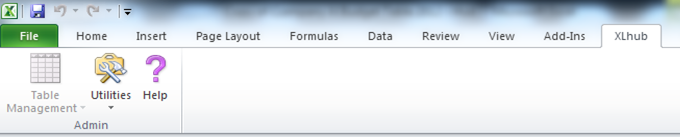
8. Start Microsoft Excel. If Excel is already open, close it and restart. You will see a new tab named XLhub.
9. You may be prompted that the publisher cannot be verified. Click Install.
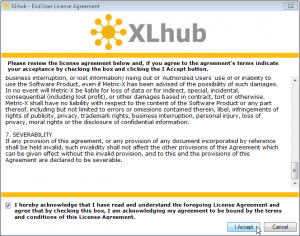
10. Read the License Agreement and check the box indicating you accept the terms of the license agreement, and click I Accept.
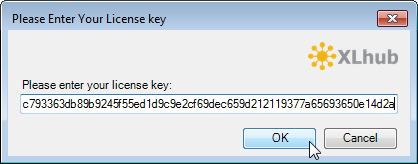
11. You will then be prompted to enter your license key. This can be found in the email sent to you by xlhub@metricx.com. Copy this key into the text box. Click OK.
Congratulations! You can now begin using XLhub!
If you like, you can view our other How To Tutorials and Application Videos to get started and unlock the full potential of Microsoft Excel using XLhub.
LIVE CHAT

Contact
Phone
248.690.5250
contact@metricx.com
Address
Metric-X, LLC Rochester, Michigan 48307